ChronoViz
Visualization of Time-based Multimodal Data
ChronoViz Digital Pen and Paper Integration
- Overview
- Setup
- Paper Documents
- Importing Livescribe Sessions
- Using Paper-Digital Notes
- Using an Anoto Bluetooth Pen
Overview
The ChronoViz Digital Pen and Paper system allows you to use digital pen technology to link notes taken on digital paper to the rest of your data in ChronoViz, and to navigate your data with paper-based controls.
The digital pen and paper integration in ChronoViz is the result of a collaboration between Adam Fouse and Nadir Weibel, and part of our ongoing research in using advanced digital tools to support obervational research.
This system makes use of Anoto digital pen and paper technology. Pages are printed with a special dot pattern that a camera on the pen recognizes as you write. We make use of this technology to know both where and when you wrote something, and link what you wrote to the rest of the data.
There are two types of pens we support:
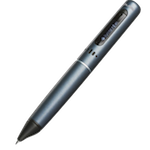
- Livescribe Pulse or Echo Pens, used for notetaking in the field.
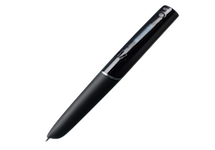
- Anoto Bluetooth Pens, used for real-time interaction with a ChronoViz session. Only the Anoto DP-201 pen is supported at this time.

Accessing Digital Pen and Paper Features in ChronoViz
To begin installation, select Setup Digital Pen Components… from the File menu in ChronoViz.
After installation, you will find all digital pen data functions described above grouped at the end of ChronoViz's File menu.

Setup
The first thing that needs to be set up are the components on your computer to transfer and store the data that comes from the digital pens. ChronoViz makes use of your computer's file structure to store the digital notes, and organizes it into digital pen projects.
Digital Pen Projects
When you import notes from your pen, the notes need to be associated with a digital pen project. This groups together notes, and also makes sure that they are displayed appropriately. You should define different digital pen projects for different kind of observations or different research efforts, and group digital paper notes pertaining to same research within a common project. A Default project is created automatically during installation, but new ones can be easily be added through ChronoViz.
Project Folder Location
When you set up the digital pen components, ChronoViz will ask you to specify a location to store the projects. We recommend using Dropbox to store the projects, because this will allow you to share the projects among your research team, and will provide automatic backups.
If you would like to use Dropbox and don't yet have it installed, please install before proceeding with the setup.
Livescribe Ethnographer++ Software
In order to collect data on the field with a digital pen, a special piece of software has to be installed on every Livescribe digital pen used for field notes and started on the pens before every note-taking session. This software, called the “Ethnographer++” penlet, can be installed on your Livescribe pen at the end of the installation process. You can install Ethnographer++ on additional Livescribe pens through the ChronoViz Livescribe Data Transfer Tool (available by selecting “Transfer Livescribe Data…” from the File menu after installation).
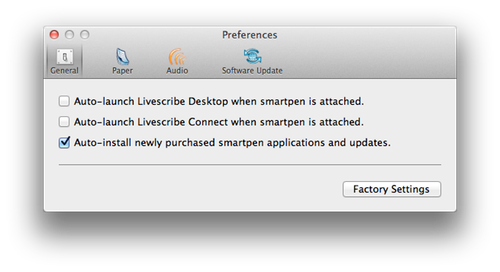
Please note that the Livescribe Desktop software tool (available at http://www.livescribe.com/starthere) must be installed on the computer to be able to set up Ethnographer++ on the Livescribe pens and to retrieve notes stored on the pen. We recommend that you disable automatic opening of Livescribe Desktop and Livescribe Connect when the pen is connected. This can be done by deselecting the appropriate options in the application Preferences under the Livescribe Desktop menu of Livescribe Desktop.
Bluetooth Pen Connection
To use Anoto Bluetooth pens with ChronoViz, Bluetooth must be turned on on your computer and the pen has to be paired with it. Every Anoto Bluetooth pen comes with a pre-defined code that you need enter while pairing the pen to the computer, prior to using any real-time pen-based functionality in ChronoViz.
Paper Documents
Once ChronoViz and the digital pens are set up, you can use different kinds of Anoto patterned pages to capture data and interact with ChronoViz.
Keep in mind that the type of printed pattern needs to match the type of digital pen, and the type of pattern needs to be manually selected when you print. However, once digital notes are loaded in ChronoViz, they can be printed with either pattern. For example, a set of notes taken in the field with a Livescribe pen can be loaded in ChronoViz, then re-printed on Anoto streaming pattern to interactively add additional notes with an Anoto Bluetooth pen.
More information about selecting a type of pattern to print is in the Anoto vs. Livescribe Printouts section below.
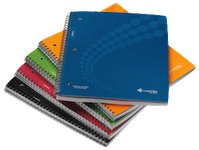
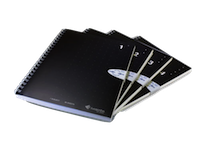
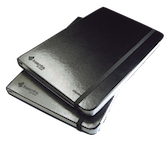
Livescribe Notebooks
Commercially available Livescribe notebooks can be used to collect data through Livescribe Echo and Pulse pens. Examples of these are the A5 and standard livescribe notebooks, or the leather notebooks.
Once the Ethnographer++ application is installed on the pen, the Livescribe Nav Plus menu (printed on every Livescribe notebook, see image below) can be used to start and stop the application.
|
 |
Paper Templates
While Livescribe notebooks might be handy to just take freehand notes, sometimes more strtucture is required. ChronoViz supports the use of custom paper templates that can be printed directly through the digital pen and paper facilities of ChronoViz.
Each project has a set of templates and every template consists of a background PDF that is printed with dot pattern to structure your notes. A template may be anything from the lines of a notebook page to a special form for recording observations in the field. In order to create a template, you need a background file in PDF form, ideally in Letter (or A4) format and portrait mode.
In the Digital Notes Manager dialog (accessed through the ChronoViz File menu), new templates can be defined by clicking on the New Template… button at the bottom of the window. After clicking this button, select a PDF file that will be the backgroud of your new template. Every project begins with a default set of templates that enable you to print standard note pages.

After selecting a template by clicking on its name, you'll see a preview of the template and have the option to print by clicking on the Print… button at the bottom of the window. Note that you will need to select the appropriate dot pattern for the type of pen you plan to use, and the resulting printed page will work only with the selected type of pen (see Anoto vs. Livescribe Printouts below). Every template can be printed with either type of pattern. Also, note that a limited number of pattern pages are available. If no pattern is available for a specific project, either one or more templates have to be removed, or a new empty project has to be defined (every empty project has a new set of patterned pages).
Printing Anoto Paper Documents
In order to print Paper templates or existing notes, you need to have a printer that can print Anoto pattern. OKI printers are officially qualified Anoto printers (you can find a list of them here), but usually any Color LaserJet printer that is Adobe PostScript compatible and can print at 600dpi or higher will do. You can find more information on how to use Livescribe Desktop to test if your printer is compatible on the Livescribe web site here.Paper Controls
Special Controls are available in ChronoViz to be printed out. In order to access them, select the Controls tab within the Digital Notes Manager window.
Among the special controls you will find the Ethnographer++ Controls that enable Livescribe users to easily start and stop data collection, without having to use the Livescribe Nav Plus menu. We recommend printing out a sheet of these controls, and cutting them apart to tape them on clipboards, printed sheets, or notebooks that you plan to use.
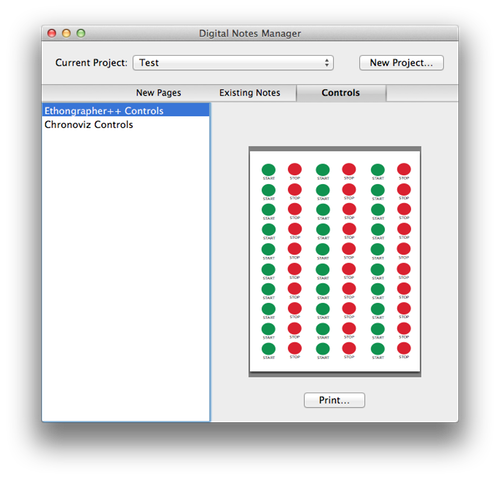
In addition to printing the controls on normal paper, we have found it useful to print these controls on Avery Stickers (Avery Template 5160). This makes it very easy to stick them on the notebooks or in any other convenient location to make it easy to start and stop the Ethnographer++ application.
Anoto vs. Livescribe Printouts
The two types of supported digital pens only work with the pattern that is specific to those pens, and therefore require paper documents to be printed with the right pattern for use with each type of pen.Livescribe commercial notebooks only work for Livescribe pens, while templates can be printed for both Livescribe Echo and Pulse pens, and for Anoto Blueetooth pens. For every paper template, the pattern to be used has to be selected at print time.

Three printing options are available for paper templates:
- Livescribe: Prints the template using Livescribe dot pattern. This paper can be used to take notes with a Livescribe pen in the field and integrate the data with a ChronoViz session.
- Anoto Streaming Without Controls: Prints the template using Anoto streaming pattern. It allows users to use an Anoto Bluetooth pen and stream data directly to ChronoViz. This will enable the user to add notes to a ChronoViz session in real-time, as well as use the paper notes to navigate the ChronoViz data.
- Anoto Streaming With Controls: Prints the template using Anoto streaming pattern and adds a special control button to every page. This option is similar to the previous one, but adds support for controlling ChronoViz through pen-based interaction (playback, stop, rewind, fast forward, frame-by-frame playback).
The ChronoViz controls can be added to any page by selecting the Anoto Streaming With Controls option, but can also be printed as a stand-alone widget that can be used by itself or in conjunction with other Anoto-based paper documents. The Controls tab enables the printing of the ChronoViz control widget. Keep in mind that since it is paper, you can cut out the controls widget and use it as a stand-alone element that you can stick on your desk or on a notebook.

Re-printing on Different Dot Pattern
Keep in mind that templates and notes can be re-printed with different pattern. If you have access to both types of pens, you can take advantage of the entire system by printing Livescribe-patterned templates to use in the field, loading those notes into ChronoViz when you get back to your computer, then re-printing those notes on Anoto streaming pattern for interactive use with a Bluetooth pen.
Importing Livescribe (Ethnographer++) Sessions into ChronoViz
After collecting data with a Livescribe pen in the field, the Livescribe Data Transfer Tool is used to import the pen data into ChronoViz and link it with the other data sources.
Downloading Data from the Pen
To download data from the pen, follow these steps:
- Select Transfer Livescribe Data… from the File menu.
- Connect your Livescribe pen via USB.
- Click the Connect button.
- Once the pen is connected, select the a date to determine which note sessions will be transferred. By default, the date is the last time that notes were transferred, which will result in transferring any sessions occured since the last time you transferred notes.
- Click the Transfer button.
Assigning Pen Data to a Digital Pen Project
When the list of note sessions appears, you need to specify a project for each session. You can do this by clicking on the pop-up menu button at the right-hand side of each note session listing. You can also give each session a more descriptive name.
If you do not assign a note session to a project, it will not be imported.
Importing Notes Sessions into a ChronoViz Document
Once digital notes data have been imported from the pen, you can bring this data into ChronoViz to explore and analyze.
To bring digital notes data into a ChronoViz session, select Digital Notes Manager… from the File menu, then click on the Existing Notes tab. This will present a list of all of the sessions that have been imported for that project. Note that after importing notes from a Livescribe pen, this window will be opened automatically. Click on a session, the click the Import Notes… button above the session preview.
This will bring up the standard ChronoViz data import window, where you will be given the option to import two types of data: “Anoto Traces” and “Annotations”. “Anoto Traces” brings in the actual marks you made with the pen, and will appear as an on-screen page. “Annotations” will create new annotations on the timeline, corresponding to continuguous segments of writing. For more information about the ChronoViz data import window, please refer to the ChronoViz Quick Start Guide.
Using Paper-Digital Notes in ChronoViz
The primary representation for Paper-Digital Notes in ChronoViz is as an interactive version of the page of notes. This representation appears automatically when you import notes into your ChronoViz document, and you can access it later by selecting Show Notes from the View menu.
Notes can also appear as annotations on the timeline. ChronoViz uses a 5-second gap as a breakpoint between annotations (the notes will therefore be segmented everytime there is at least a 5-second interval between two strokes). When you hover the mouse over one of the notes annotations, the pop-up window will show the notes that are included in that annotation.
The 5-second gap is currently hard-coded into ChronoViz. In a future release of ChronoViz there will be a user preference to change this, and we also have a plugin in development that will allow for much finer control over annotation creation.
Aligning Notes
If you took the notes with a Livescribe pen in the field, the first thing you will need to do is make sure that the notes are properly aligned with the rest of the data. To align the notes, find a point in the video that will be an easy to find landmark in the notes. Find the corresponding point in the notes, then right-click (or control-click) on that point and select Align to Playhead. This will shift the notes so that the selected point is lined up with the current frame in the video.
Using the Notes for Navigation
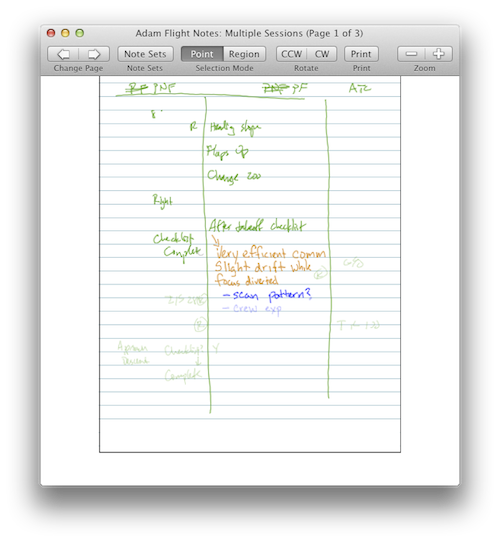
The interactive notes can be used for navigation of the data simply by clicking on any note that you can see on-screen. This will cause the playhead in ChronoViz to jump to the time when that note was recorded.
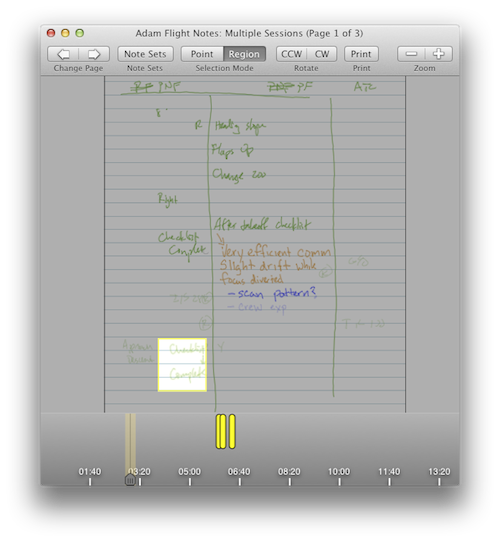
You can also select regions of the notes to visualize when notes in the select region were recorded. Click the Region button in the toolbar that is part of the Selection Mode pair of buttons. This will cause a timeline to appear at the bottom of the notes window. You can drag a rectangular selection box on the notes, and the times of the corresponding notes will apppear on the timeline. Clicking on one of the notes on the timeline will drive the ChronoViz session back at the point when the particular note was taken.
Configuring the Interactive Notes
The buttons in the toolbar can be used to configure the notes display. From left the right, the buttons are:
- Change Page: Switch between pages of the current notes document.
- Note Sets: Configure which note sets are displayed (see below for further description).
- Selection Mode: Change how mouse clicks on the notes are interpreted.
- Rotate: Rotate the current page 90 degrees counter-clockwise or clockwise.
- Print: Print a new paper version of the notes.
- Zoom: Zoom in or out of the notes.
The Note Sets button brings up a list of notes sessions that have been loaded into ChronoViz. The check boxes can be used to show or hide note sessions. The color boxes are interactive, and can be clicked to change the color of that note session. This will change both the color that is shown on screen and in print.

Using an Anoto Bluetooth Pen with ChronoViz
Anoto bluetooth pens can be used to interact in real-time with ChronoViz to control playback of the ChronoViz data, to navigate existing notes and to add supplementary notes on top of existing ones.
Connecting to ChronoViz
Before you connect the pen to ChronoViz, make sure that you are using a pen that has been paired with your computer.
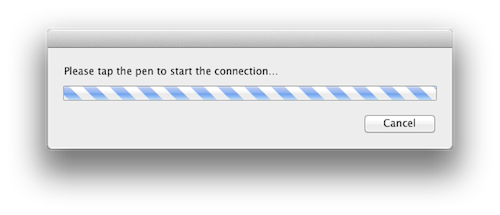
To connect the pen to ChronoViz, select Start Bluetooth Pen Connection from the File menu. This will bring up a window while the connection is starting. Wait until the window says “Please tap the pen to start the connection”, then tap the pen on a page that has been printed with Anoto streaming pattern. When the connection window closes, the connection has been formed.
Interacting with ChronoViz via Bluetooth
Basic use of the Anoto Bluetooth pen and printed paper is the same as with the on-screen version of the notes. Use the pen to tap on any existing notes, and ChronoViz will jump to the corresponding point in the data
In addition, you can write new notes on paper. New notes that you write will be recorded at the current time in ChronoViz, and will appear on the on-screen notes representation as you write. Notes that are written at the same time will be grouped together as annotations.
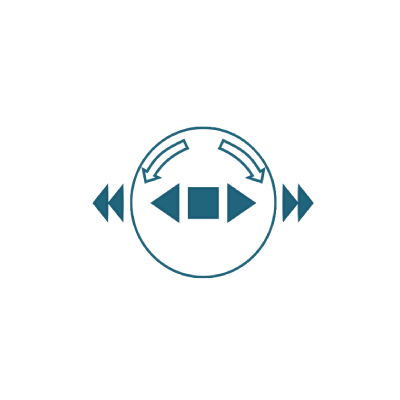
If you have printed the paper controls, then you can also use those to navigate in ChronoViz. The play/stop controls work as standard controls, and the circle around the controls can be used like a jog dial to move frame-by-frame.